

Since my youngest is in LOVE with Minnie, her costume was easy to come up with!! :)
For the skirt:
 * amount of fabric will depend on the size of skirt - I made a size 2T & had 1 yd. of fabric with a ton left over!! I measured my daughter's waist & doubled it for the "width". For the length of the skirt, I measured from her waist to just above her knee, then added about 2", to allow for hemming.
* tulle - if desired. I used pink & black - less than a yd. each.
* elastic for waistband (mine was 3/4" wide)
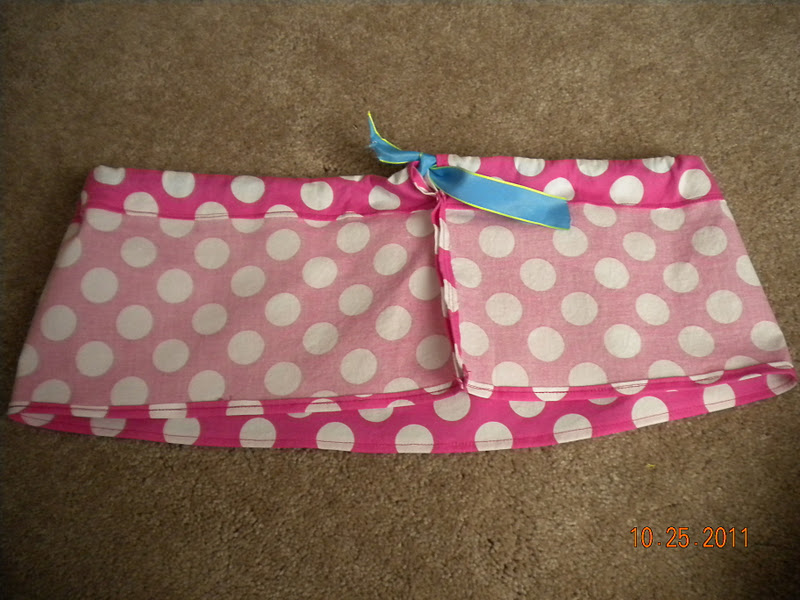
Since my fabric wasn't long enough, I cut 2 equal length panels & sewed them together, creating a "tube". Then, I turned it inside out & hemmed the bottom & top and left a gap on top for the elastic waistband. (The blue ribbon you see was used to tie the skirt so I could make sure it fit ok!! ;)

After carefully measuring out my tulle, I cut 4 strips of pink & 4 strips of black, and layered them alternately. Once pinned in place, I sewed them.
 This is the finished skirt. I added another row of polka dots under the tulle layer to make the tulle stand out! (As you can tell, my tulle is kinda faint - I thought 8 layers would be good. . . maybe 16 would be better??!! ;) Finally, I added the elastic & it was done!! :)
For the shirt:
 I cut one strip of fabric, about 2-3" wide. (Length will depend on the collar of your shirt.) I hemmed both edges & gathered one.
I pinned the collar onto the shirt & sewed in place.


Since the shirt was black & I wanted the patch to stand out, I attached it to white felt.

I trimmed the felt & sewed the felt onto the shirt BEFORE attaching the patch! It would have been a pain to sew along the edge of the felt with the patch in the way!!
For ears:

I cut 4 circles out of black (glittery) felt & sewed along edges. Then, I folded the bottom edge & hot glued to a hair clip. (Had to play with it a bit to get them to "stand" right!)

For the bow:

 I cut a small length of fabric, (again, depending on head size), stitched ends together, then hemmed top & bottom. Turned right side out. Pinched center & used craft wire to hold in place.


I attached a hair clip to the BOTTOM of the center piece, not the back. (Minnie's bow stands off her head, doesn't lay flat!! ;) Then, added a little bling to the center!! :)


